Did you build a Facebook business page expecting lots of likes and comments on the content you worked so hard for – but have found no one is even seeing your posts? Without spending money on Facebook ads, it’s hard for businesses to get the reach that they deserve.
Which is why you need a Facebook Group!
Facebook groups are the key to building a community of fans that you can engage with. Although you would expect likes and comments on your Facebook page, Facebook groups are actually designed for this, so you will be getting the engagement that you set out for originally. You can also get opinions and advice on anything – so if you want to find out what your audience would change about your website, or interesting topics that they want you to cover in your next blog, you can get all of this advice for free. You can get more attention to your call to action, driving leads, since Facebook Groups have a feature that allows you to post your most interesting post/posts that you want to draw attention to at the top of your page. This guarantees that anyone who visits your page will see this. You could even put a downloadable link for your latest newsletter there – once your visitors see how great your content is, they will be coming back to your page for more.Facebook groups are great for business networking – you can unite potential clients, current clients and your fan base. Ensure you have an ‘open group’ that allows anyone to join, giving you a higher chance of more networking opportunities that wouldn’t have necessarily been there before when it was a closed group.
How To Create a Facebook Group
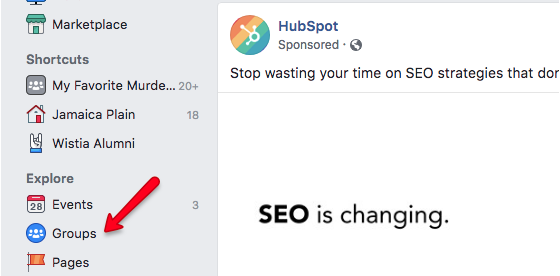
1. Navigate to the “Groups” button under “Explore” on your Newsfeed page
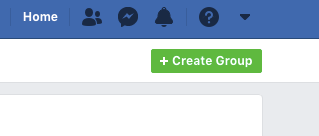
2. Click “Create Group” in the top right corner
3. Customise your group settings
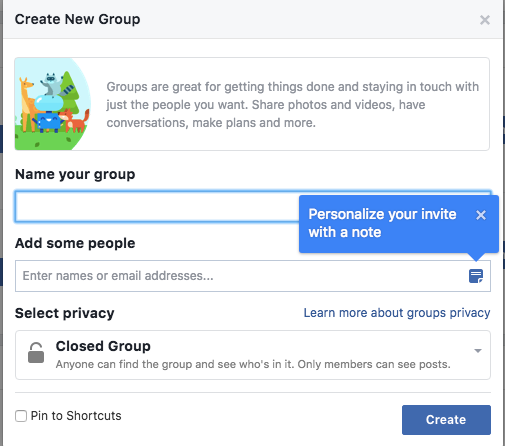
Make sure you include:
The name of your group
- This should be short, compelling, direct and communicate the purpose of your group well.
Invite people
- When inviting people, personalise a message explaining why they should join your group. Invite all existing clients and people from your Facebook Business Page.
Select your privacy settings
- Having an open group means anyone can see the group and what’s posted in it. This is the best option when attracting leads as it will be easier for the public to come across and join. If you want a more personal group that may have sensitive information discussed, then a closed group is definitely the option, but only members will be able to post and see posts – the group is still searchable by the public though. A secret group allows only members to find the group and see posts.
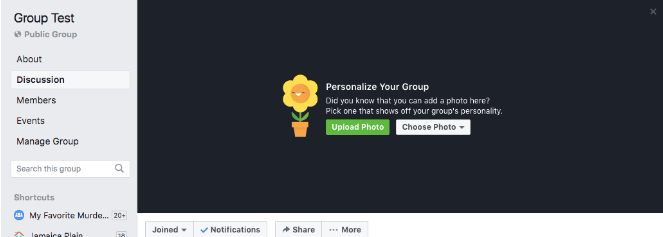
4. Upload your Facebook group photo
- This is one of the most important features of the group, it needs to be aesthetically pleasing and compelling, and represent your business well.
5. Edit group settings and customize your content
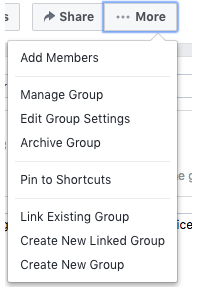
You can do this by clicking the “…More” section, right below your group photo, and then clicking “Edit Group Settings.”
Include:
- Group description
- Group type
- Tags – helping members find groups they may be interested in
- Location – helping you connect with the right people
- Link other pages similar to yours
- Group colour
- Privacy settings
6. And lastly, create your first post!
Start by engaging with your audience and asking them a question, such as a poll!
Be sure to “Like” our Facebook to keep up to date with the latest digital marketing tips and tricks!
https://en-gb.facebook.com/07HeavenMarketing/
For further insights and guidance, we invite you to explore our blog at 07hm.co.uk/blog. Here, you’ll find a wealth of information tailored to the needs and challenges of SMEs navigating the digital landscape. Additionally, if you have specific questions or need personalised advice, don’t hesitate to reach out to us via email at info@07hm.co.uk or telephone on 01702 410663.


